


 Leathering up with recycled belts.  |
| If you have damaged seats (caned or rush) but love the chairs, you can renew them. Duct tape on mine was unattractive so I went with recycled belts |
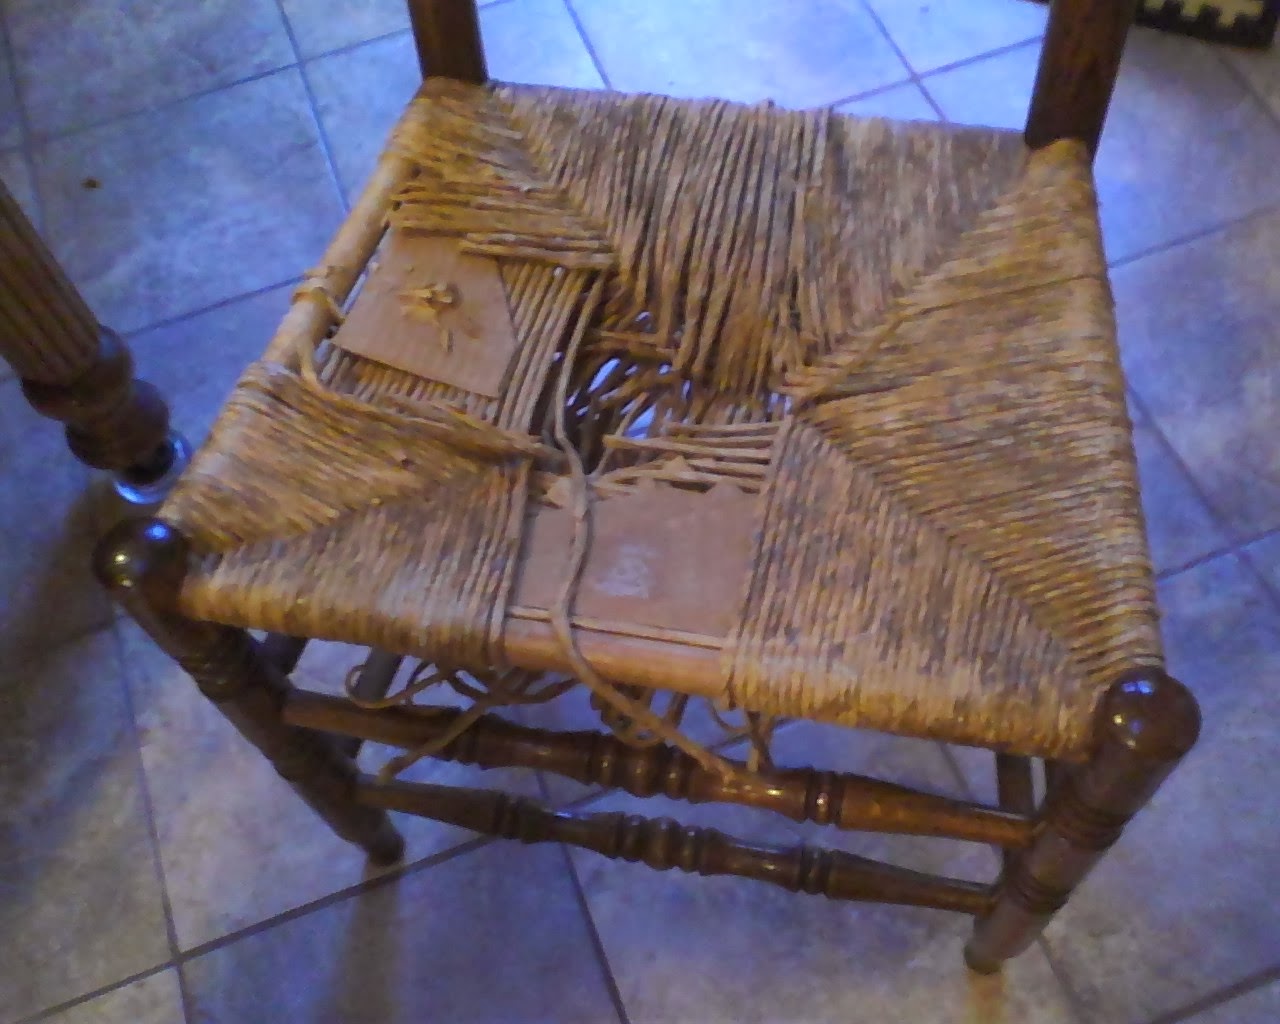 |
| This needed fixing. |
 |
| This was ugly for a few months. |
 |
| Let's start over. |
 |
| Belt layout |
 |
| Attach belts, cutting off excess strap |
 |
| Attach to other side of the seat frame |

 |
| Weave in front to back belts and attach |
 |
| One done; three more to go! |
 |
   
Materials:
Around 20 leather belts
-more or less, depending on the size of your seat. Mine is 15"X18" and I used 20 that I bought thrift shopping
-Any width or colors you desire, I used 3/4"-1.5" widths in browns and blacks
Leather Conditioner or Cleaner
Box of 1/2" wood-screws (some belts may use one on each side, wider belts will need another or two)
Tools:
Utility knife
Sandpaper, fine grit
Cleaning sponge
Drill driver with drill bit and screw driver bit to match your wood-screws
Tape measure & pencil
1. Clean/condition belts and set aside to dry.
2. Cut away and remove all seat material and any nails and screws from the seat frame. Clean the seat frame from any glue or accumulated residues by lightly sanding and wipe off with a damp sponge.
3. Measure to find the center of the seat to place the first belt in both side to side and back to front directions
4. Prepare your seat design by laying the belts over the frame from side to side to get the desired look you want and to be certain you have enough belts. Then do the same for the front to back.
5. Take the front to back layer of belts and set to one side laid out for your guide, and do the same for the side to side layout to keep your design order laid out.
6. Beginning with your center mark for the side to side belts, start with your center belt of your layout and prepare to attach it by cutting off the buckle. (leaving only the belt strap to use) From the underside and inside of the seat frame, drill a pilot hole through the belt into the frame. Set your first wood screw in. Pull the belt tight straight over to the other side of the frame and underside . Again, drill the pilot hole through the belt into the frame. Screw in place. Trim off excess leather belt with utility knife. Continue with each belt to complete the seat layer, allowing equal spacing for weaving the front to back belts next. TIP: Keep belts tight on frame, the leather will loosen with wear over time.
7. Start the front to back layer by using your center belt on your center pencil mark. Pilot hole, screw in place and repeat but weaving the belt one over, one under to reach the other side. After weaving tight to other side, pilot hole and screw in place. Repeat until done.
8. Sit and enjoy!
TIPS:
Shop garage sales and thrift shops for great belts.
Go with any color scheme you wish.
Some belts that are man-made can be used but avoid the easy to break or tear type. If any of the straps become broken or loose on the seat over time of use, the damaged belt can be unscrewed and removed and a new one weaved in.
Don't do or get a manicure before the project.
       
~~~~~~~~~~~~~~~~~~~~~~~~~~~~~~~~~~~~~

With Sinea at Ducks 'N A Row
     |


Thank you for linking up at the Blog Strut Blog Hop! I can't wait to see what you link up next week! I would love for you to hop over anytime to Apeekintomyparadise.com and link up with the parties I co-host throughout the week!
ReplyDeleteHave a terrific weekend!
Cathy
APeekIntoMyParadise.com
#blogstrutbloghop
I totally love your creative fix for these seats. They look AMAZING!!! Following you back on GFC.
ReplyDeleteThank you, Audra. I must tell you I was so glad to do this. Between how well they look and the durability, it was the best choice and I'm glad I did it. The leather should hold up for a great deal of time.
ReplyDeleteThat's an awesome idea! My mother in law would love this!
ReplyDeleteAnother great idea! I never would have thought to use belts:)
ReplyDeleteI hope she can use this idea. Let me know how it turns out.
ReplyDeleteI started out thinking I could copy the rush technique using leather string which brought me to this idea instead. Some people use mens' neckties in this weave method. That type wouldn't work for us in the kitchen though. Thank you for stopping by :)
ReplyDeleteI love this- it's so creative and cool looking! I've seen loads of these battered chairs at estate sales but never bothered to look twice at them, but now I will!
ReplyDeleteI agree with you. I have always done the same and now when I see them, belts come to mind every time. I hope you find some and have fun doing them. Thank you for taking the time to stop by.
ReplyDeleteSuch an ingenious idea! It looks fantastic.
ReplyDeleteStopping by from the No Rules Weekend Hop. :)
Thank you, Sharon! So glad you stopped by :)
ReplyDeleteNow I wish I had kept that old rocking chair that needed repair. You make it look so easy
ReplyDeleteThanks for linking up at the Bloggers Brags Weekly Pinterest Party
I've passed up on these types of chairs at yard sales in the past. Now I give them a second look. :)
ReplyDeleteAbsolutely AMAZING!!!! Pinned em. You HAVE to come to Wonderful Wednesday Blog Hop on Ducks 'n a Row tonight (7pmEDT Tues) to share this PLEEEEEEASE?
ReplyDeleteLinked it for you, Sinea! Thank you for the sweet invite! ox
ReplyDeleteHow awesome do these look!! You could literally make them any design and colour. So stylish and personal. Love it.
ReplyDeleteThanks for sharing at Marvelous Monday on Smart Party Planning :-)
Absolutely; any color or many colors! How fun that would be! The leather can be painted (some of the leathers stained) as well. So glad you stopped to check this out, Catherine! Thanks! :)
ReplyDeleteHey, I liked this so much that I've picked it to be my feature on tomorrow's Ultimate Facebook Party on Ducks 'n a Row!! Hope to see you there :)
ReplyDeleteBless your heart! I'm so honored to post your button! Thank you, Sinea ox
ReplyDelete